Panoramic images are usually warped to cover large fields of view. It is therefore not possible to simply paste text or other images into the panorama. This article describes how to extract perspectively corrected rectilinear partial views, which can be edited using standard Photoshop or equivalent tools. The edited partial views are later seamlessly reinsterted into the panoramic image. Using this technique it is possible to insert text and images into panoramas.
Requirements:
A working installation of the free Photoshop plug-in
Panorama Tools is required. The program and installation instructions can
be downloaded from this site.
The program consists of two sets of plug-ins: Panorama Tools (submenu:
Adjust/ Correct/ Perspective/ Remap) and PanCntrl (submenu: Apply Changes,
Get Pano, Increment, Move left, Move Right, Tilt down, Tilt up, Zoom In,
Zoom Out). The following tutorial example assumes that Photoshop is the
installed plug-in host. Other programs may be slightly different.
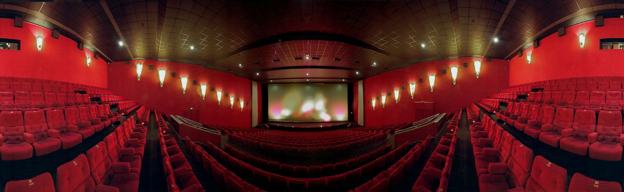
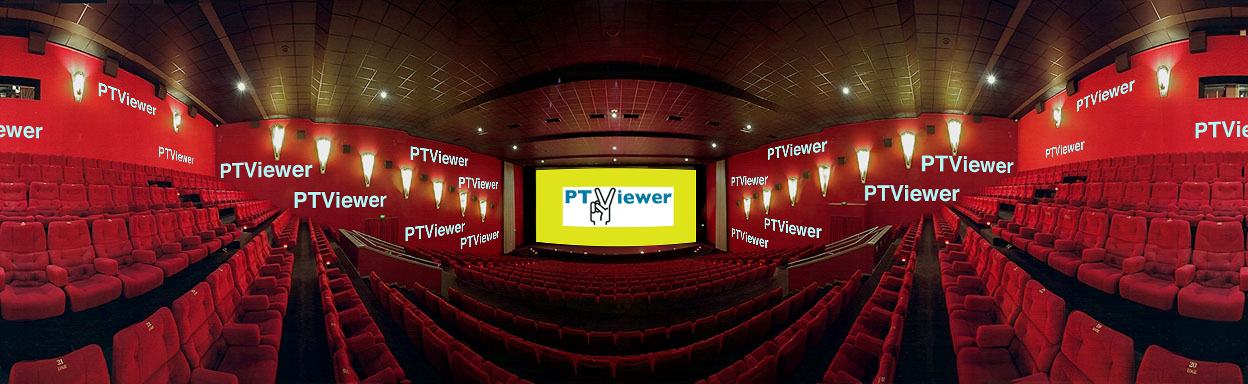
The example below uses an image provided by and Copyright Thilo Nass. This image is a cylindrical 360° panorama as used for QTVR-panoramas. The original size is 1284*384 pixels. The task consists in inserting an image into the screen of the cinema. I chose the PTViewer logo designed by Jochum Berg.
1. Selecting an Editing Window
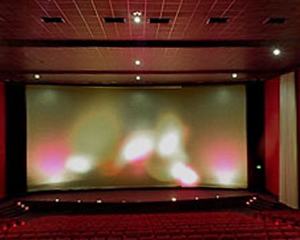
Open the image in Photoshop. Then select Panorama Tools->Adjust from the Filter menu. In the Preferences Dialog (Pref) choose options (b) and (c), and click OK to get back into the main 'Adjust' dialog. Select 'extract' and 'use options'. Then click 'Set' to set these options. A new dialog window is displayed, which you have to fill. There are 4 main entries:
2. Adjusting the Editing Window
This image does not exactly face the screen, and slight corrections are required. These can be performed using the PanCntrl tools. They resemble the usual controls of VR-viewers like horizontal panning (Move right, Move left), Vertical tilting (tilt up/down) and zooming. Movements are much slower since high quality bicubic interpolators are used. Selecting 'Increments' let you set increments for the pan angles and zoom factor. Using these controls, you can set any arbitrary view for editing. In the current example, only a slight horizontal movement is required: Set Increments->pan to 2 degrees, then Move Left once.
3. Editing the Partial View
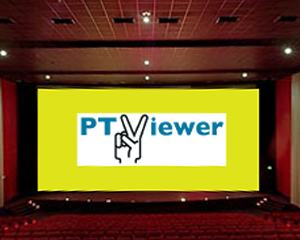
You can now edit this image using any Photoshop tool. However, do not resize the window (which is possible but requires some more actions, see Readme of Panorama Tools). For our current example, we select a rectangular region the size of the screen, then fill this rectangle with yellow color. Then we insert the PTViewer logo.
4. Inserting the edited image into the panoramic image
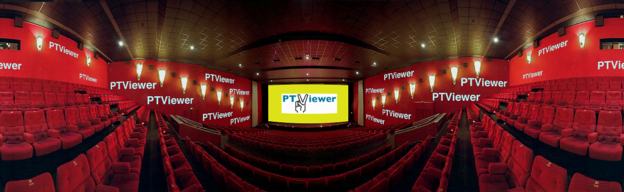
The final image needs to be flattened first. Photoshop plug-ins only read the current active layer of the active document, and after editing, this is probably not the whole image you want to insert. After flattening, select PanCntrls->Apply Changes. This inserts the image into the previously saved buffer, hence the need to save it in the first place. To see the final result, choose PanCntrls->Get Pano, which loads the buffer into Photoshop. Save this file as final result.
For this example, I have added some more graffiti to the walls of the cinema. To edit the right wall, I extracted an image with Hfov=120 at position yaw=88, and resinserted it later. For the back wall, I chose yaw=178, and for the left wall yaw=-92. See the final image, or download the full size version:
5. Creating the VR-panorama
The final result can be converted into a QTVR-panorama. Be sure to turn it 90 ccw first. For this demonstration I used the java-viewer 'PTViewer'. In this case, the image has to be remapped to 'PSphere' format (see PTViewer documentation). You can see the final result as Java-panorama here.
Copyright ©2000 H.Dersch der@fh-furtwangen.de